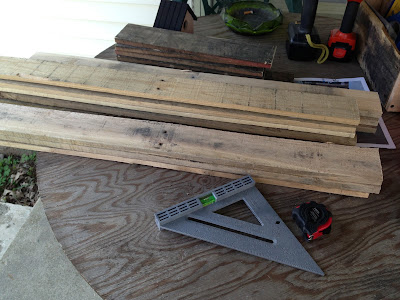
So I started out with two pallets, and if you have taken apart pallets before not all pieces are great and may have a split in the wood ( I use those for other projects). I disassembled the pallet and chose my wood. (And of course I am impatient and like to finish projects as quick as possible and forget to take picks in-between).
Here is my wood pile for the 2 sides, back, and the dark wood in the back was used for the shelves to rest on. I laid out all of my wood and determined the height of my shelf base on the shortest piece of wood. I then measured the rest of the wood and cut them even with the shortest one. On my case I used 3 pieces on each side and 5 across the back. The two shelves in the center have three pieces. After I put the sides and back together I screwed on the shelves. Then I chose two pieces of wider wood that are usually the end pieces on the pallets for the base, I did the same for the top, leaving an over hang of about 2 inches. I had a gap in the back on the top and I sat staring at it for about an hour when I looked down at my scrap pile and seen the triangles that were cut from the pieces the shelves rest on. So I started playing around with them and this is what I came up with....
For the very bottom I cut two pieces of the pallet that all the boards are attached to. I measured them out so that the arch that is in them was even on both the front and the back. (HINT: Measure twice cut once :) )
Then I sanded it down, this took about an hour and I used my mouse sander (which I love, the sandpaper velcros onto the sander, and a 5 pack of sandpaper costs about $2 at Walmart).
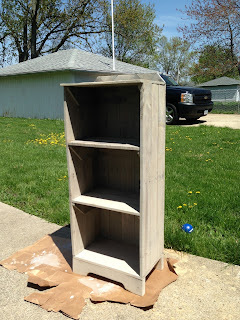
Afterwards I stained it with "sunbleached" stain. I was trying to go for something that seemed beachy... As I plan on repainting my bathroom soon and want to do a light blue and I think this will be a perfect match.
I only used one coat of stain and let it sit over night, the next morning I sprayed it with a furniture finishing spray that is clear with no gloss.
Here she is in the daylight. I love how she turned out ( not sure why I think of it as a she)!
Hope you enjoyed it! If you have any questions feel free to message me and I can give a more detailed explanation. :)


No comments:
Post a Comment